Remote Control
External equipment can send commands to the robot (control and running program files) in different remote control modes like remote I/O mode and remote Modbus mode.
Note
- You do not need to restart the robot control system when switching remote control mode.
- No matter what mode the robot control system is in, the emergency stop switch is always effective.
- If the robot is running in the remote control mode, the project will stop running automatically when you switch to other working modes.
Online Mode
The default control mode. The robot is controlled using DobotStudio Pro.
Remote Modbus
In this mode, external equipment can control the robot arm over Modbus.
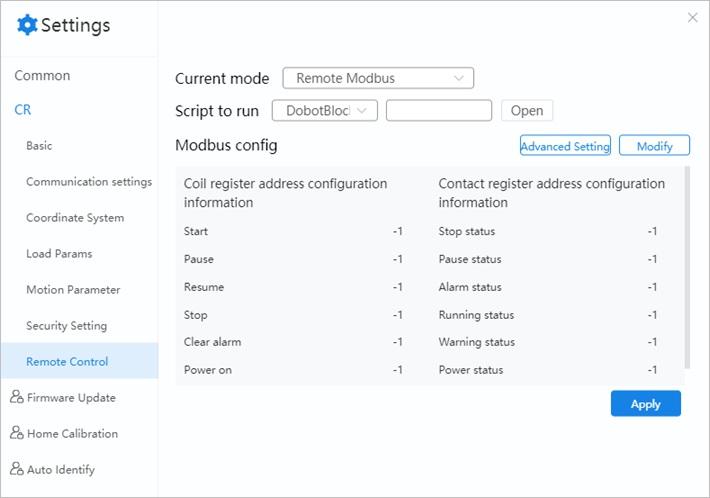
The specific functions of Modbus registers are shown above. You can click Modify to edit it. The procedure of running the project in the remote Modbus mode is described below.
Prerequisites
- The project to be run in the remote mode has been prepared.
- The robot is connected to the external equipment through the LAN interface. You can connect the
equipment directly or through a router. The IP address of the robot and the external equipment
must be on the same network segment without IP address conflict. The default IP address of the
robot is
192.168.5.1. You can configure the IP address in Communication Settings. - The robot arm is powered on.
Procedure
- Set Current mode to Remote-Modbus, and select an offline project (block program or script) to run.
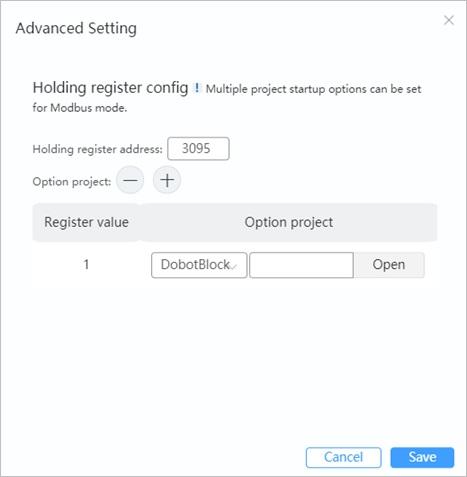
- If you need to start multiple different projects through Modbus, click Advanced Setting. In the Advanced Settings menu, you can set Hold register address of the project and configure the list of projects, as shown in the following figure.
- Click Apply to set the arm in remote Modbus mode. Only the emergency stop command is available through the DobotStudio Pro software.
- Trigger the starting signal from the external equipment. The robot will execute the selected project file.
- If the stop signal is triggered, the robot arm will stop moving and be disabled.
Remote IO
In this mode, external equipment can control the robot arm using IO.
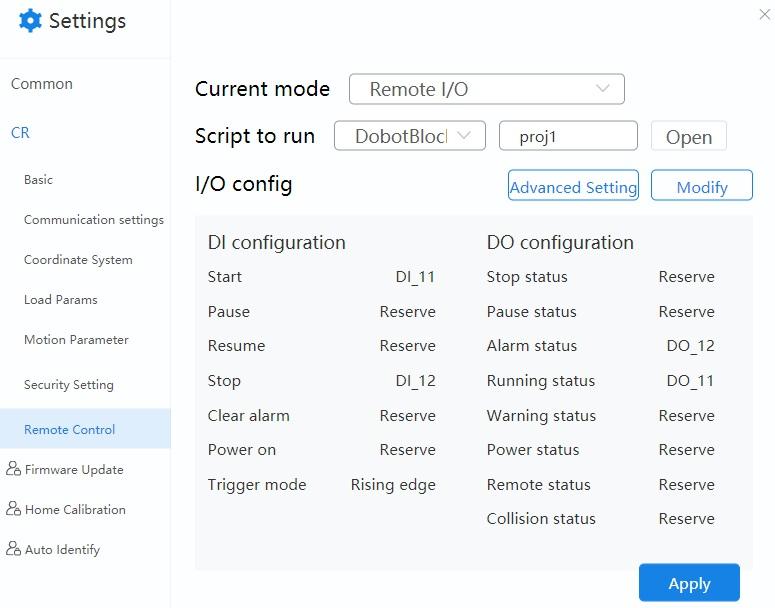
The specific IO interface definition of the control system is shown in the figure above. You can click Modify to edit it.
When using the CCBOX type control cabinet, safe I/O and universal I/O share the same terminal. The terminal configured as safe I/O cannot be configured as remote I/O.
Clicking Advanced Setting allows configuration of multiple projects through group I/O.
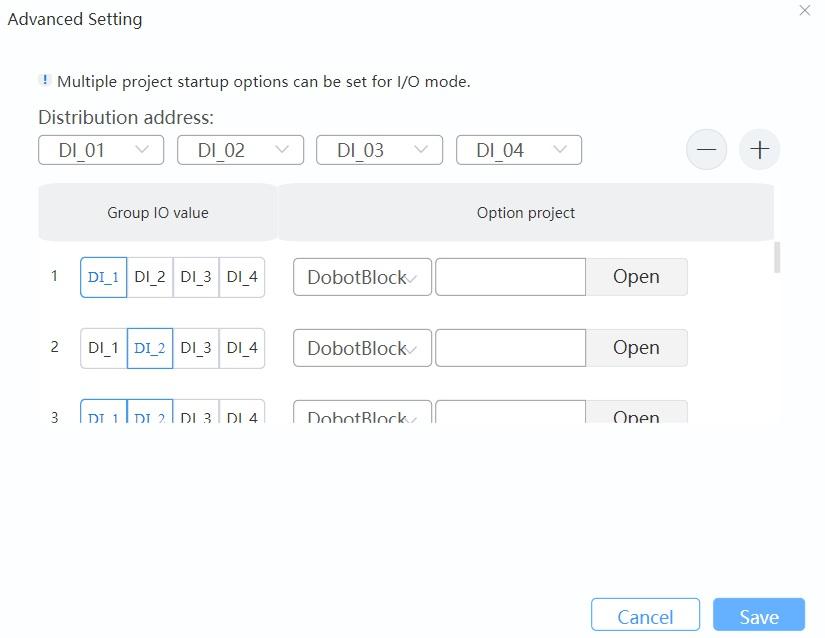
- Click + or - to increase or decrease the number of addresses assigned to group I/O. The
more the assigned addresses are, the more configurable projects are.
- 0 address: Optional projects cannot be configured.
- 1 address: 1 optional project can be configured.
- 2 addresses: 3 optional projects can be configured.
- 3 addresses: 7 optional projects can be configured.
- 4 addresses: 15 optional projects can be configured.
- You can modify the assigned address through the drop-down list. The address assigned to group I/O cannot be duplicated with remote I/O or safe I/O (CCBOX).
- After assigning addresses, you can set optional projects (at least one) for each group IO value.
- In remote I/O mode, before running the project, select the corresponding optional project by setting the corresponding (blue refers to ON, and gray refers to OFF) group IO value.
- Take assigning DI1~ DI4 in the figure above as an example:
- DI1 is ON, DI2, DI3 and DI4 are OFF: select the first optional project;
- DI1 and DI2 are ON, DI3 and DI4 are OFF: select the third optional project;
- DI1 - DI4 are all ON: select the 15th optional project.
- When all group IOs are set to OFF, it means selecting the main project configured in the previous page.
- Click Save to complete the configuration.
The procedure of running the project in the remote I/O mode is shown below.
Prerequisite
- The project to be run in the remote mode has been prepared.
- The external equipment is connected to the robot arm via the I/O interface.
- The robot arm is powered on.
Procedure
- Set Current mode to Remote I/O, and select an offline project (block program or script) for running.
- Click Apply to set the robot arm to Remote IO Mode. Only the emergency stop command is available.
- (Optional) Trigger group I/O on external devices and select a project to execute.
- Trigger the starting signal. The robot will execute the selected project file.
- If the stop signal is triggered, the robot arm will stop moving and be disabled.
TCP/IP Secondary Development
See TCP/IP Protocol for details.