Pairing Your Controller
This guide walks you through setting up a Bluetooth joystick controller to control your X-Series manipulator to an Ubuntu Linux computer.
Note
The Interbotix software only supports the usage of SONY PS4 and PS3 controllers.
SONY PS4 Controller (Recommended)
- Click the Bluetooth icon on the top right of your screen, followed by Bluetooth Settings.
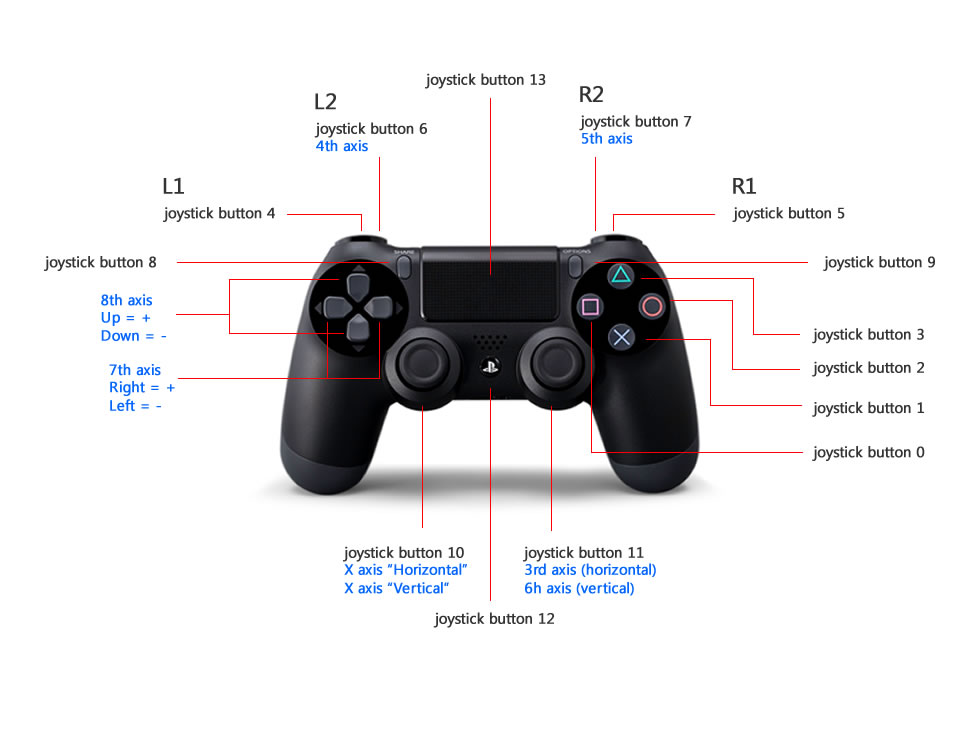
- Press and hold the Share button on the PS4 controller (see image below for reference).
- While holding the Share button, press and hold the PS Button. After a few seconds, the triangular shaped LED located between the L2 and R2 buttons should start rapidly flashing white (about twice a second) at which point you can let go.
- On the computer, click the + icon in the Bluetooth settings window.
- Wait until you see Wireless Controller pop up, select it, and click Next on the bottom right of the window.
- A message should display saying successfully set up new device ‘Wireless Controller’ and the LED should turn blue. This means the controller is connected to the computer.
- To disconnect, hold down the PS Button for about 10 seconds until the LED turns off.
- To reconnect, just press the PS Button (no need to hold it down). After blinking white a few times, the LED should turn blue.
SONY PS3 Controller
Get an original SONY PS3 controller and it’s accompanying USB cable.
Open up a terminal by pressing Ctrl + Alt T, and enter the following commands.
$ sudo bluetoothctl
[bluetooth]# power on
[bluetooth]# agent on
[bluetooth]# scan on
Plug the PS3 controller into the Linux Laptop. At this point, a message should pop up in the terminal that looks something like the following (with a different MAC address):
[NEW] Device FC:62:B9:3F:79:E7 PLAYSTATION(R)3 ControllerWhen it appears, type:
[bluetooth]# trust <MAC-address>
Unplug the PS3 controller and press the PS Button. The four red LEDs at the front of the controller should flash a few times, eventually leaving just one LED on by the ‘1’. This means that the joystick paired successfully.
Note
Sometimes, the joystick might cause the cursor of the computer mouse to go crazy. To fix this,
add the following line to the ~/.bashrc file:
alias joy_stop='xinput set-prop "PLAYSTATION(R)3 Controller" "Device Enabled" 0'
Now, whenever the PS3 joystick is paired to the computer, just type joy_stop in the
terminal to stop it messing with the mouse.
Raspberry Pi 4b & SONY PS4 Controller
- Once the Pi boots, click the Bluetooth icon on the top right of your Desktop, followed by Setup New Device.
- A window should pop up welcoming you to the Bluetooth Device Setup Assistant. Click the Next button.
- Press and hold the Share button on the PS4 controller. While holding the Share button, press and hold the PS Button.
- After a few seconds, the triangular shaped LED located between the L2 and R2 buttons should start rapidly flashing white (about twice a second) at which point you can let go.
- On the computer, click the Magnifying Glass icon on the lower left of the Device window. Wait until you see Wireless Controller pop up, select it, and click Next on the bottom right of the window.
- A message should pop up asking if you would like to Pair Device or Proceed Without Pairing. Select Pair Device and click Next on the bottom right of the screen.
- A new message should now display asking you to either connect to Human Interface Device Service (HID) or Don’t Connect. Select the Human Interface Device Service (HID) option and click Next.
- In the following screen, you should see a message either saying that the Device added successfully, but failed to connect or that the Device added and connected successfully. This is typical and you should just click Close on the bottom right of the screen.
- If the message said that the device connected successfully, you will need to disconnect and reconnect the controller for the next step. To do that, hold down the PS Button for about 10 seconds until the blue LED at the front of the controller turns off.
- Then, tap the PS Button on the controller (no need to hold it down), and after waiting a few seconds, you should see the LED at the front turn blue.
- At this point, you should see a small popup on the top right of the screen titled Bluetooth Authentication. Make sure to click the Always Accept option. This means that the computer will always pair with your PS4 controller when you tap the PS button.
Troubleshooting
Controller Isn’t Turning On
Your controller might be dead. Try charing it for an hour or plug it into your computer.
PS4 Controller LEDs Blink A Few Times and Turn Off
Your controller may have a low charge level and needs to be charged. Try charing it for an hour or plug it into your computer.