Networking
Connecting to the Controller with a Network Cable
DobotSCStudio can communicate with the controller directly through a network cable.
Procedure
- Connect one end of the network cable to the LAN interface on the controller and the other end to the PC.
- Navigate to the Control Panel on your workstation and go to the Network and Sharing Center.
- Click Local Area Connection on the Network and Sharing Center page.
- Click Properties.
- Double click Internet Protocol Version 4 (TCP/IPv4).
- Select Use the following IP address and change the IP address and subnet mask of the PC.
- IP address:
192.168.1.12 - Subnet mask:
255.255.255.0
- IP address:
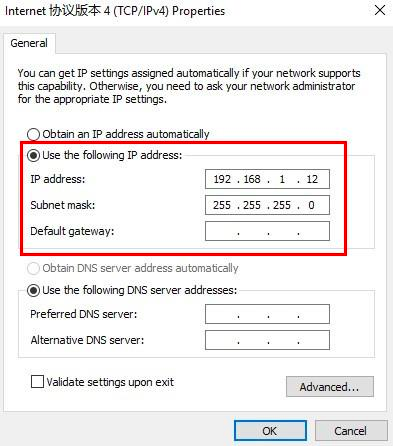
- Click OK.
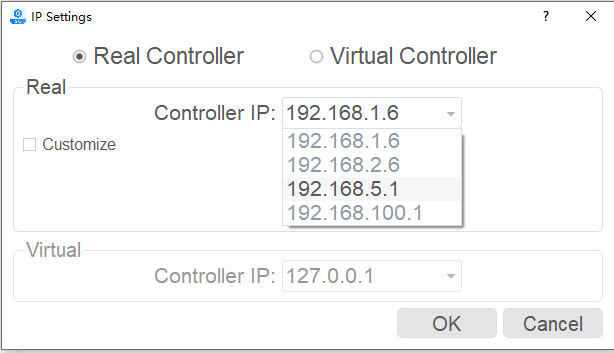
- Click the dropdown arrow on the upper right of the DobotSCStudio and select IP settings…
- Set the controller’s IP address to
192.168.5.1and click OK.
Connecting to the Controller over WiFi
Procedure
- Connect to the Dobot WiFi. It will start with
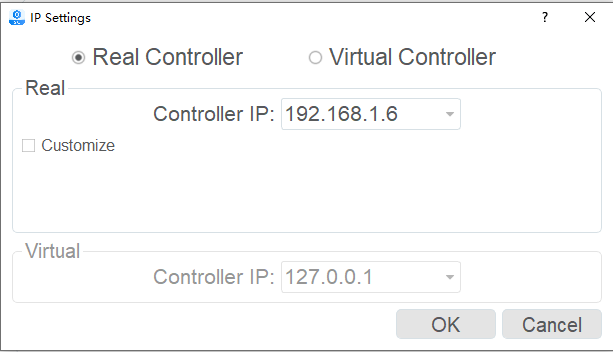
Dobot_WIFI_. The default WiFi password is1234567890. - Click the dropdown arrow on the upper right of the DobotSCStudio and select IP settings…
- Set the controller’s IP address to
192.168.1.6and click OK.
SSH into the Controller
Occasionally, you may need to SSH into your controller to edit configuration files, load trajectories, etc.
Procedure
Make sure your remote computer is connected to the cobot’s network. You can verify this by opening a terminal (CMD, PowerShell, GNOME Terminal, etc.) and pinging the IP of the connection method you used.
$ ping 192.168.1.6 # or 192.168.5.1 if using an Ethernet connection
Run the ssh command to SSH into the controller’s computer. The controller’s username is
rootand the password isdobot.$ ssh [email protected] # or [email protected] if using an Ethernet connection
Your terminal will now open a shell on the controller’s computer.
[root /]$